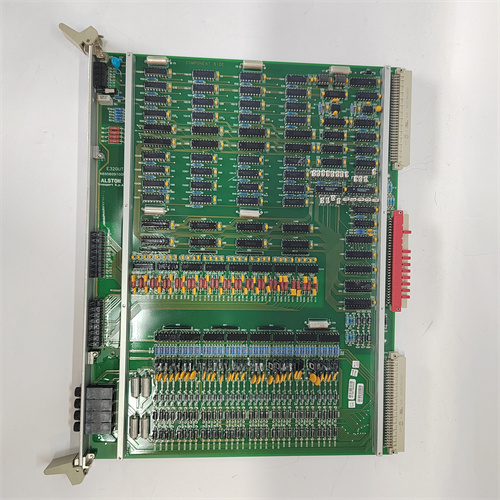
Description
The KEYENCE ML-9100 is a high-performance, non-contact laser displacement sensor system designed for ultra-precise measurement and inspection in industrial applications. Part of KEYENCE’s renowned laser micrometer series, it utilizes a scanning laser beam to perform fast, accurate measurements of dimensions such as thickness, width, height, and position. It is engineered for challenging online measurement tasks where contact methods are impossible or where high speed and precision are critical, such as in the production of rubber, film, metal, and electronic components.
Application Scenarios
In a high-speed lithium-ion battery electrode coating line, the uniformity of the active material coating is paramount. A variation of just a few microns can critically impact battery performance and lifespan. A KEYENCE ML-9100 laser micrometer is installed directly over the moving foil. It scans a focused laser beam across the foil’s width at an extremely high rate. As the beam traverses, it precisely measures the distance to the surface, generating a real-time profile of the coating thickness. The system’s controller instantly calculates the average thickness, minimum, maximum, and standard deviation. If the thickness drifts outside the stringent tolerance band, the ML-9100 outputs an alarm signal to the PLC, which can automatically adjust the coating head. This application solves the core problem of preventing wasteby enabling 100% inspection and real-time process control, ensuring every meter of coated foil meets specification, directly saving material costs and preventing downstream assembly issues.
Parameter
Technical Principles and Innovative Values
The KEYENCE ML-9100 employs a sophisticated scanning laser triangulation method, setting it apart from simpler point-sensor lasers.
Innovation Point 1: Scanning Beam for Profile Capture. Unlike a single-point sensor that measures only one spot, the ML-9100 uses a rotating polygonal mirror to sweep the laser beam at high speed across the target surface. A high-speed CMOS array captures the reflected light. This allows it to capture an entire cross-sectional profilewith a single scan, enabling simultaneous measurement of multiple features like width, gap, and height difference, not just a single point’s displacement.
Innovation Point 2: Ultra-High-Speed Sampling & Advanced Algorithms. It captures tens of thousands of data points per second. This massive dataset is processed in real-time by proprietary KEYENCE algorithms. These algorithms can filter out noise from vibration or surface texture, accurately detect edges even on semi-transparent or low-reflectivity materials, and calculate derived values (like min/max/average thickness) with extreme stability. This speed and processing power are what enable reliable measurement on fast-moving production lines.
Innovation Point 3: Ease-of-Use & Robustness. Despite its internal complexity, the system is designed for quick setup. The controller features an intuitive touch screen interface for guided programming. The sensor head is built to withstand industrial environments, often with an IP67 rating for dust/water resistance. KEYENCE’s “2-point teaching” method allows users to easily calibrate the measurement by simply placing the target at two known reference points, eliminating complex manual calculations.
Application Cases and Industry Value
Case Study: Automotive Gasket Manufacturing, Germany. A manufacturer of precision metal/rubber composite gaskets faced high scrap rates due to inconsistencies in rubber bead height and width, leading to sealing failures. Manual sampling with calipers was slow and missed variations. They installed a KEYENCE ML-9100 system above the conveyor post-curing. The laser scans each part, instantly measuring bead profile at multiple cross-sections. Parts are automatically sorted by the system’s judgment output. The result was a 60% reduction in scrap and the elimination of warranty claims related to sealing. The system paid for itself in under 4 months. The plant manager highlighted the ML-9100’s ability to measure the soft, curved rubber bead without contact as the key breakthrough.
Case Study: Ultra-Thin Polyester Film Production, Japan. A producer of optical films for displays struggled with nanometer-level thickness variations causing “Newton’s rings” (interference patterns) in the final product, leading to visual defects. Contact measurement was impossible without damaging the film. A KEYENCE ML-9100 with a specialized model for transparent films was installed. Its advanced algorithm compensated for the film’s translucency and internal reflections. It provided real-time thickness trend data with sub-micron repeatability, allowing immediate feedback control to the extrusion die. This enabled a five-fold reduction in thickness variation and allowed the company to enter a new, high-margin market for premium optical films, generating millions in new annual revenue.
Related Product Combination Solutions
The ML-9100 is often part of a complete measurement or control solution.
Controller (e.g., ML-9500/ML-9600): The separate processing unit that powers the sensor head, houses the interface, and runs the software. The user programs measurements and views data here.
Sensor Head Mounting Fixtures & Stages: Precision mechanical mounts, slides, and alignment stages to position the sensor head accurately and stably relative to the target.
External Display Units: KEYENCE or third-party monitors for displaying measurement results on the shop floor away from the main controller.
I/O Link Master Modules: For seamless integration into factory networks, especially with PLCs from manufacturers like Siemens or Omron, simplifying wiring and data handling.
Data Logging Software (e.g., KEYENCE LogiRecorder): PC software for recording long-term measurement trends, performing statistical process control (SPC), and generating reports.
Rejection Mechanisms: Solenoid pushers, air blowers, or robotic arms that are triggered by the ML-9100’s judgment output to remove defective parts from the line.
PLC/HMI Systems: The broader factory control system (e.g., Siemens S7-1500. Mitsubishi FX5) that receives measurement data from the ML-9100 for higher-level process control and operator visualization.
Installation, Maintenance, and Full-Cycle Support
Installation requires careful mechanical mounting of the sensor head perpendicular to the target surface at the specified working distance. The controller is typically mounted in a control panel. They are connected via a dedicated cable. Setup involves:
Connection: Wiring power, I/O, and communication cables to the controller.
Teaching: Using the controller’s touchscreen to perform a simple 2-point calibration with master samples of known dimension.
Programming: Setting up the measurement parameters (which points on the profile to analyze), tolerance limits, and output logic.
Maintenance is minimal. The primary task is keeping the sensor head’s lens clean from dust or debris using approved methods. Regular calibration checks with a master sample are recommended. The controller provides comprehensive self-diagnostics.
We provide end-to-end support: from initial application evaluation (we can often test your sample parts), to system configuration and sales, on-site installation guidance, and ongoing technical support. We can supply genuine KEYENCE sensors, accessories, and offer calibration services to ensure your measurement system maintains its specified accuracy, maximizing your production quality and yield.
Struggling with precision measurement challenges? Contact us for a free application evaluation. Our experts can test your samples with the KEYENCE ML-9100 and demonstrate its potential to solve your quality control issues.
